29

Pandora Turtle Draw? 

29.0.0

Turtles is part of the graphic program Pandora. This documentation about the Turtle draw function is meant as an interesting study subject for all of you who are into making graphics & design or as being a programmer.

Back to main index

29.0.1

Whenever you have questions about the explanation in this manual you should refer to the paragraph number which is listed at the left side column. This paragraph, which you are reading now for example, is numbered as paragraph 29.0.1

29.0.2

This manual uses a style sheet - please make sure that both style sheet and Java option are set enable for your browser.

For response see Marc Marc contact file
All pages & contents are Copyrighted (C)1998 by Marc Marc Amsterdam


29.1

Pandora Turtle Draw

Introduction 

29.1.0

Introduction

Turtle draw has its roots in the LOGO computer language. It was told to me that this languages was designed for children (I never have seen children working with it). Frank Ostrowski implemented the Turtle draw instruction set into his GFA-BASIC. Because Pandora is mainly written in this Basic it was not hard to also equip her with this Turtle draw instruction set.

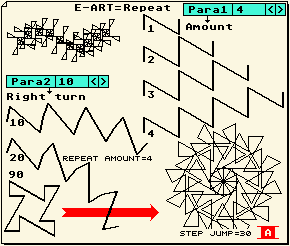
What is Turtle draw? The idea of Turtle draw is to be able to program images by a simple to understand program language. The syntax of the language includes instructions that are named exactly according what they do (should it not always be like this?).

You have a pencil in your hand and I ask you to: "Pen Down", "ForwarD 10", "Right Turn 90", "ForwarD 10" and "Pen Up". You have drawn a line that bends 90 degrees in the middle. Now we agree on the simplicity of: "PD FD10 RT90 FD10 PU" to tell exactly the same. Here you are: Turtle draw as it is extracted from its original roots and via the short Basic notation adapted by Pandora.

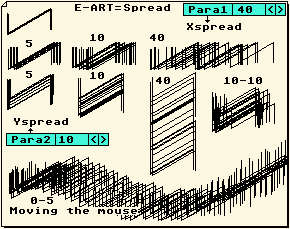
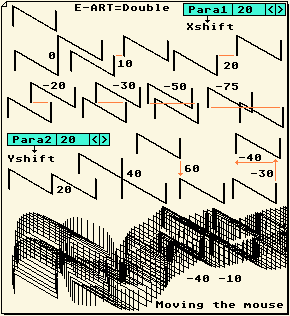
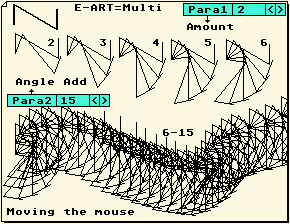
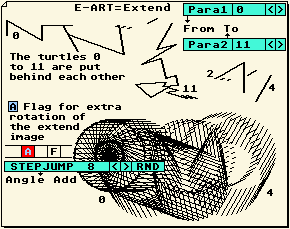
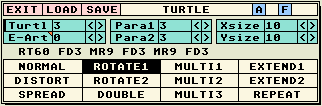
In this issue I will introduce you to all the Turtle instructions and extra's to become familiar with the fun of Turtle draw.

29.1.1

Basic effect options


29.2

Pandora Turtle Draw

Menu 

29.2.0

Instruction set

The sub menu can be divided in several parts. These are the Presets, their numeric parameter values, the flags on top and the Turtle instruction line. I assume that operating with the presets, parameters and flags is known by you already. The Turtle instruction line however is a new subject. When you want to enter this line to change the values and instructions, you have to click with LeftMouseKey at the line itself and hold down LeftMouseKey a fraction of a second longer than you are used to. A cursor will appear - ready for input.

The following table shows all the possible instructions that you can include to a Turtle instruction line


FD  n    ForwarDs            n=pixels
BK  n    BacKwards           n=pixels
SX  n    Size X              n=factor
SY* n    Size Y              n=factor
SX  0    Sizer X off (at 1)	
SY* 0    Sizer Y off (at 1)
LT  n    Left Turn           n=degrees
RT  n    Right Turn          n=degrees
TT  n    Turn To             n=degrees
MA  x y  Move Absolute       X&Y=pixels
DA  x y  Draw Absolute       X&Y=pixels
MR  x y  Move relative       X&Y=pixels
DR  x y  Draw Relative       X&Y=pixels
CO  n    Colour              n=colour
PU       Pen Up
PD       Pen Down

* Do not use: Compiler bugs that lead to a Crash!!!
29.2.1

Instruction set

The Turtle edit line in Pandora has a maximum of 36 characters. You are advised to leave spaces between the instructions for clarity. But, when you really need more space, you can write the instruction behind each other without spaces. Only when two numeric value are following each other, you have put a space between them:

MR10 10 instead of MR1010.

29.2.2

Editing

When the cursor appears on the edit line, you have the following keyboard commands to edit the line.

     [Insert]        Insert a space.
     [Delete]        Delete character.
Ctrl+[Delete]        Delete complete line.
     [Cursor left]   Move cursor to the left.
     [Cursor left]   Move cursor to the right.
     [Space]         Space.
Ctrl+[Cursor Left]   Cursor to begin of line.
Ctrl+[Cursor Right]  Cursor to end of line.
     [Undo]          Restore original line.
     [Return]        Exit edit mode and take over result.

Notice that you are always editing in the OVERWRITE mode. Thus, using the Space bar does not lead to inserting spaces (use [Insert] for this).


29.3

Pandora Turtle Draw

Parameters 

29.3.0

Parameters

The 7 available parameters to control the use of the Turtle do have the following meaning.

Turtle  Select turtle 0...11.
E_Art   Select execution Art 0...5.
para1   Set effect parameter 1.
Para2   Set effect parameter 2.
Xsize   Set Horizontal size scaling.
Ysize*  Set vertical scaling.

* Put out of order because of compiler faulty code.
29.3.1

E_art

The E_Art value determinate the execution art that is used in combination with the selected Turtle. When you click with LeftMouseKey at the {E_Art} button, a dialog appears to select one of the 7 arts. The index number of the selected E_Art will be displayed too. The following Arts are available:

29.3.2

Para 1 & 2

The effect of Para1 and Para2 is varying for each E_Art setting. The following table lists briefly their function.


E_Art          Para 1        Para2
Normal/Rotate  Angle *       Angle Add *
Distort        XY random *   Angle Rnd *
Spread         X spread *    Y spread *
Double         X shift *     Y shift *
Multi          amount        Angle Add *
Extend         First         Last
Repeat         Amount        Right Turn *

* The parameter is allowed to turn negative.
  

29.4

Pandora Turtle Draw

E_Arts 

29.4.0

E_Arts

Each E_Art setting will be visualized by an illustration and some text. I presume that the illustrations are clear enough to save me a lot of words.

29.4.1

Normal / Rotate (0)

Normal: To use the Turtle as a single image.
Rotate: To use the Turtle in a rotating complex.


Distort (1)

To set the Turtle as a multiple with an irregular distance from each other and/or irregular angle setting (Randomly).


29.4.2

Spread (2)

To irregular spread the Turtle.


Double (3)

To execute the Turtle 2 times after each other and have control over the distance from the second relative to the first.


29.4.3

Multi (4)

To execute the Turtle more times behind each other and have control over the angle change after each execution.


Extend (5)

To connect more turtles behind each other.

29.4.4

Repeat (6)

To repeat a turtle more times and have control over the rotation angle (Right Turn) after each execution. The difference with the Multi mode is the fact that the Repeat mode also repeats a turtle when Para2 is set to zero.


29.4.5

Flags

There are two flag's to set for extra effects.

[A]
When this flag is set, extra rotation is the result when executing a turtle as a multiple (keep on holding LeftMouseKey depressed). With the STEP JUMP parameter from the main graphical menu the Angle add can be set.


It might be clear that this facility steals a parameter display from another menu section. The consequence is that the setting of the STEP JUMP parameter is NOT stored as being part of a Turtle preset.

[F]
This flag has the function to patternize the lines that build up the Turtle.

29.4.5

XY Size

With Xsize and Ysize one can scale the size of Turtle. A value of 10 means a scaling of 1. Thus, the parameter value is set per 1/10.


by Marc Marc (C)1991...2001